In this in-depth guide, we will discover how to convert a PSD into WordPress, but first, let’s become acquainted with some fundamental concepts related to the PSD to WordPress conversion procedure.
WordPress began as a basic blogging platform but over time developed into a complete content management system. This is an incredibly popular PHP-based CMS, which powers over 60percent of the total of all websites.
It is utilized by a wide range of websites, from well-known eCommerce companies to highly trafficked personal blogs. Recent data show that more than 50,000plus new WordPress websites are published every day, illustrating the CMS’s enormous popularity and usage.
The popularity of WordPress can be attributed to its simplicity, adaptability, and wealth of themes and plug-ins. While the sheer number of themes makes it possible to completely alter the appearance of your website with only a few clicks.
The availability of more than 55 thousand plugins makes it possible to increase the performance of your website without having to go into its source code.
What is PSD?
The default file format used by Adobe Photoshop to save user files is called a PSD (Photoshop Document). Photoshop is unquestionably the best and most widely used graphic design application on the market right now. Most professional designers utilize it to develop unique designs.
Steps to convert PSD to WordPress
Your site development project would be beneficial from a PSD to WordPress conversion. Although converting a PSD file to a WordPress template is a difficult task.
It can be simplified if you take the time to learn about the procedures involved or hire PSD to WordPress conversion specialists. ConvertinWP has the best, most Knowledgeable team who is an expert in PSD to WordPress and available 24/7 for your assistance.
Let’s have a look at the 6 easy processes that make up this conversion procedure for your convenience.
Step 1:
You must first carefully examine your PSD and understand any potential challenges involved in converting it to WordPress. This conversion entails several steps. These steps include splitting up the mockup into HTML and adding the header, title, and CSS codes.
Web developers should be able to easily transform PSD files into HTML code. A precise initialization is thus provided by PSD analysis before the actual conversion process begins.
Step 2:
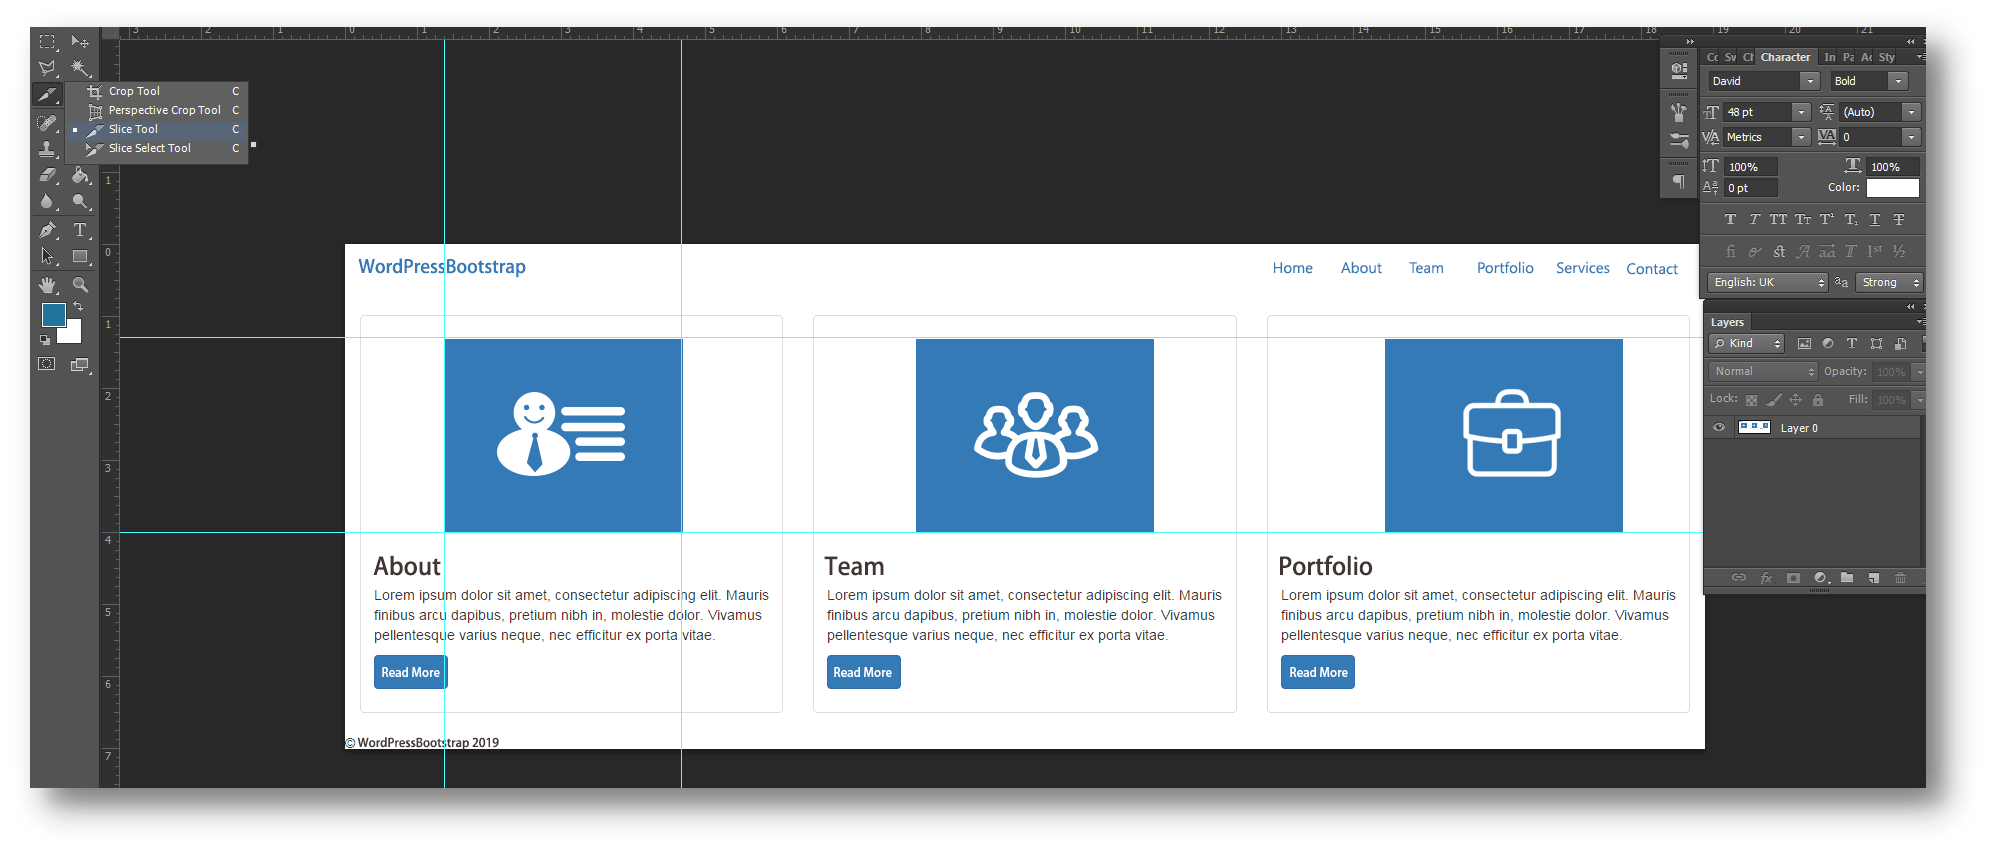
After carefully reviewing your PSD, the following step is to slice the images out of the PSD. If you are wondering what the phrase “slicing” refers to, it simply means splitting a single image file into numerous separate image files. Each of which contains the various design aspects of the overall design.
It is practically impossible to code the entire design from a single image. Thus, this phase is crucial. Meaning that to code a web page, you must first break your PSD into individual image files and then logically combine them.
Simply open your design file in Photoshop and identify the photos that require slicing to accomplish this. To make the process of slicing simpler, look for components first, such as backgrounds and additional visual components, separators, footers, headers, and other such components.
Using Photoshop, you would be able to cut and save pixel-perfect images in either JPEG or PNG format. You must be very careful when slicing your PSD to consider what can be set and what can be generated flexibly. A few lines of CSS code can be used to quickly create the elements.
Therefore, you are not forced to cut to save these components as images. Only remove elements like background graphics and logos that cannot be dynamically produced. Keep in mind that your website will load faster if it has fewer graphics.\
Step 3:
Developers are prepared to build an HTML website after the slices have been stored. This website must have the same design as your PSD.
You should create separate files with the extensions index.html, style.css, and index.php for the HTML, CSS, and PHP codes, respectively. All HTML components’ visual presentation will be managed by the CSS file.
The professional script visual design, cross-browser compliance, and speed have all been carefully considered during its comprehensive writing, testing, and improvement. To enhance the interface and make it more interactive, JavaScript is also built for this.
Step 4:
Once the coding portion of the PSD to HTML conversion is complete, you must integrate HTML/CSS with WordPress. Two important files that are utilized to create a WordPress theme are Index.php and Style.css.
You must divide the index.html file into.php files. If all works as planned, the result will be flawlessly crafted WordPress templates.
Step 5:
Now you will be dividing an HTML file into the WordPress theme files. All markup components have already been converted at this point into WordPress PHP codes.
archive.php, category.php, comments.php, comments-popup.php, footer.php, header.php, and so forth.
To create a completely functional WordPress theme, you must now include a few extra functionality and WordPress tags. The end user will have more control over the theme appearance settings, including the ability to install plugins and widgets.
Step 6:
Any web development method must include testing. Your finished WordPress theme gets unit tested in this step. WordPress, PHP, and JavaScript issues have all been repaired. W3C standards are used to validate HTML and CSS. The theme has also undergone testing for responsiveness, performance, and browser compatibility.
Conclusion
You may easily develop a unique responsive WordPress theme by following the steps above. As you can see, converting a PSD to a responsive WordPress theme is a complicated task that calls for strong technical abilities. You may run into issues during the conversion process. In that scenario, we advise hiring a qualified WordPress developer from ConvertinWP.
For more such articles head on to our blogs section!