Introduction
Wix and WordPress are two of the most popular website building platforms on the web today, with millions of websites created using each one of them. Some significant differences between these platforms could potentially sway you one way or the other when it comes to choosing which one you want to use to build your website.
The millions of people who have created websites on Wix are not all happy with their decision. For many, Wix is fine for small businesses with very simple needs. But when you need something a little more robust, a managed hosting platform like WordPress is often better. WordPress can do everything that Wix can do however it is just faster, better-looking, and more reliable.
Here is why and how you should make the switch from Wix to WordPress.
Transfer Wix Website To WordPress
Why Switch From Wix To WordPress?
There are two main reasons you would want to make the switch: first, WordPress is free. Second, it is not just for blogs. It can be a powerful website builder in its own right. Here is a quick guide that breaks down why that is so. A quick guide on why WordPress is better than Wix: The biggest advantage of WordPress over Wix is flexibility.
With WordPress, you do not have to worry about paying extra for advanced features or getting locked into an all-or-nothing package; you pay only for what you need. That means more freedom to build exactly what you want without having to jump through hoops or shell out extra cash. If you are looking to create a professional website with a lot of functionality and customizability.
On top of all that, WordPress is open source which means anyone can use it for free as long as they adhere to certain guidelines around licensing and attribution. If you are looking for something simple but powerful enough to give your business some professional polish, look no further than WordPress.
Steps To Move From Wix To WordPress

1. Choose a Web Host
When you are starting, one of your biggest expenses will be web hosting. You mustn’t cut corners here, your website is your home online, so it needs a nice place to live. On your search for a web host, make sure they offer enough storage space. Also, check to see if there are any bandwidth limits (you want unlimited).
If you are planning on creating an e-commerce site or selling products or services directly through your website, look for a web host that offers e-commerce tools as well as shopping cart software like Shopify or Magento. And finally, consider whether you want email services included in your package.
2. Set up a temporary domain
Before your website transfer is done, you will want to set up a temporary domain with which to test your new site. It is best if it looks similar, but is not identical, to your current site design. We strongly recommend buying a domain name for 30 days just in case something goes wrong with your site during or after transfer. Connecting a Domain is the option that will allow you to use an existing domain name that is already registered on another hosting provider.
Registering a domain allows you to customize it to make sure everything works correctly before transferring over your website files and settings. If possible, pick a short URL name because these tend to be easier for users to remember and type out into their browsers.
3. Install WordPress
Your website transfer is complete. Now, it is time to set up your new site using WordPress. The setup process should be intuitive. Your old theme will translate over with few tweaks required, and you can spend more time adding articles and connecting with readers than tweaking code. WordPress is easy-to-use, efficient, cost-effective, and friendly. You cannot ask for much more on a web platform.
4. Change Your New Site’s Permalink Settings
Once you’ve installed WordPress, change your permalink settings. On Wix, it’s Settings > Permalinks (under Advanced Options). On WordPress, it’s Settings > Permalinks. Click Save Changes once you’ve made these changes. You must use a different post slug for each of your posts. If you use the same slug for multiple posts, Google will have trouble indexing them properly.
5. Install a theme and designs
Now you need to set a theme. Go ahead and install one of your favorite free themes or even one that comes with WordPress. Remember, we want our website to look professional, so it is worth paying for an attractive theme. You can choose the same-looking theme as the previous one, however, you should make it a bit different. The best website designs, including themes, are offered by our company. Whether a client chooses to use fresh themes or designs or an older one is entirely up to them.
6. Import the Content from Wix to WordPress
This process is different for every website builder, but in general, it involves exporting your data into a .zip file, uploading that file to a storage solution like Dropbox or Google Drive, then importing that data into WordPress. Once you have transferred all of your content (pages, posts, images) over to WordPress, you will need to edit each post and page so that they format correctly on WordPress.
Convert Wix Site To WordPress
Step 1. Import Blog Content from Wix to WordPress
You can import your blog content from Wix after setting up your WordPress theme. Move your Wix RSS feed even if Wix does not have an export capability. You won’t need to manually copy and paste each blog article thanks to this. To create the feed, you must include an RSS button on your Wix website.
Then, you may access your RSS feed. Click the RSS icon on your live website to get started. This will launch a code-heavy XML webpage. Anywhere on the page, use your right mouse button to select Save As, then save the file to your computer in a readily accessible place.
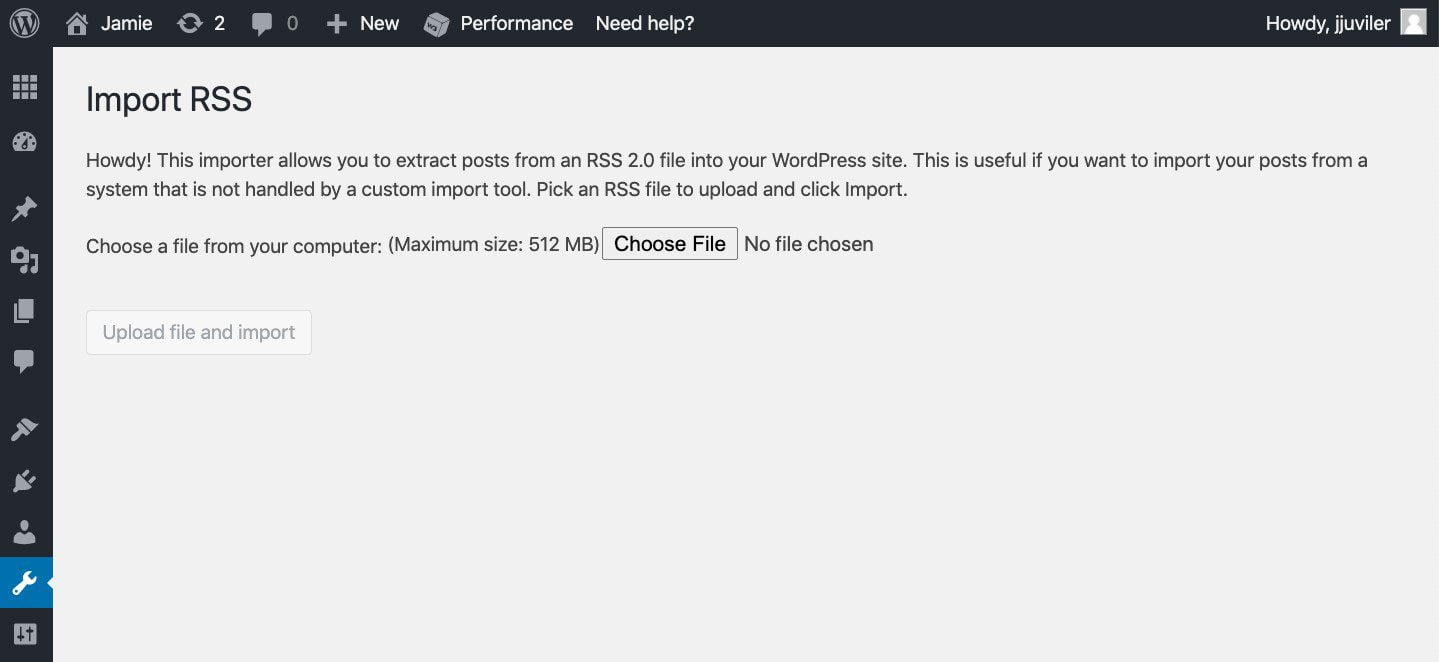
Once the file has been saved, go into your WordPress website and select Tools > Import. Select Run Importer in the RSS area as you scroll down. Click Choose File on the following page and then open the RSS feed file you just saved.
Step 2. Transfer Your Wix Pages to WordPress
Only your website’s posts, not its pages are imported during the migration of your RSS feed. Unfortunately, that step of the process cannot be automated. Instead, you’ll have to manually construct each page in WordPress.
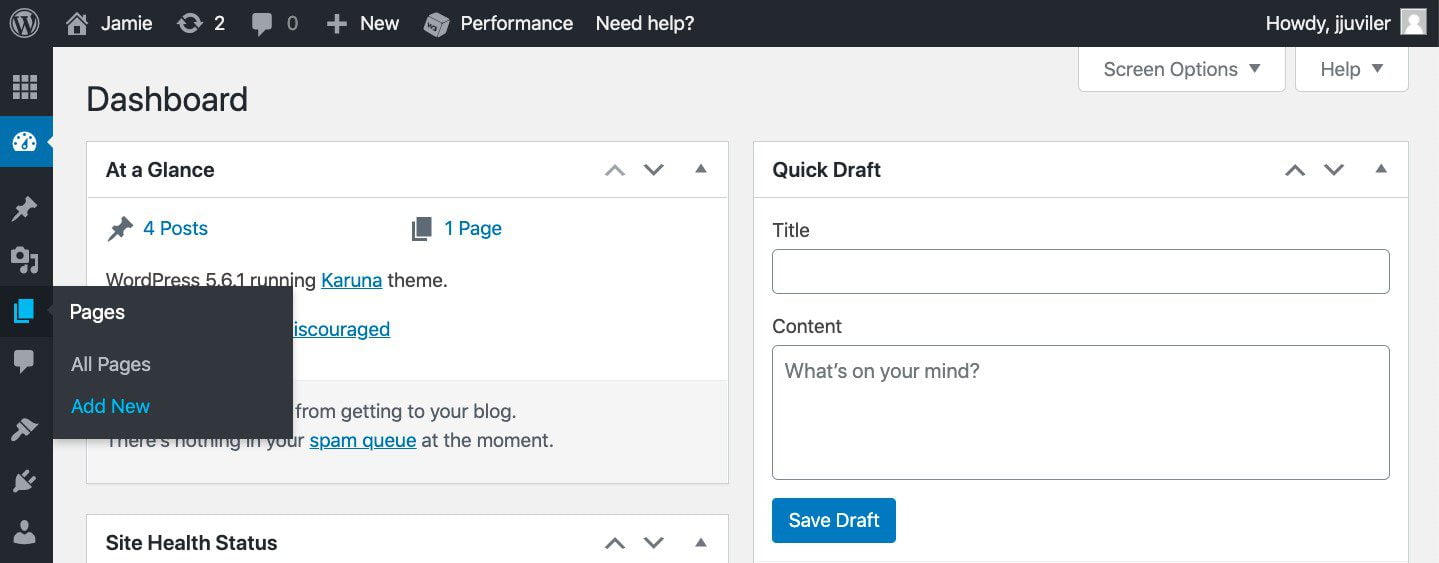
Open the first page from your Wix website that you want to import to begin the process. After copying its text, go to WordPress and select Pages > Add New.
Copy the text, then paste it onto the new page. You must also re-add any photos, links, and other media as well as change the title, formatting, and styling as necessary. The page can then be made live by selecting Publish after that, check your pages on the front end, just like you would with posts, to make sure that everything appears to be in order.
You can utilize a third-party solution in place of manually recreating your pages. You can convert your complete Wix website to WordPress using tools like CMS2CMS. It costs money and includes pages and graphics.
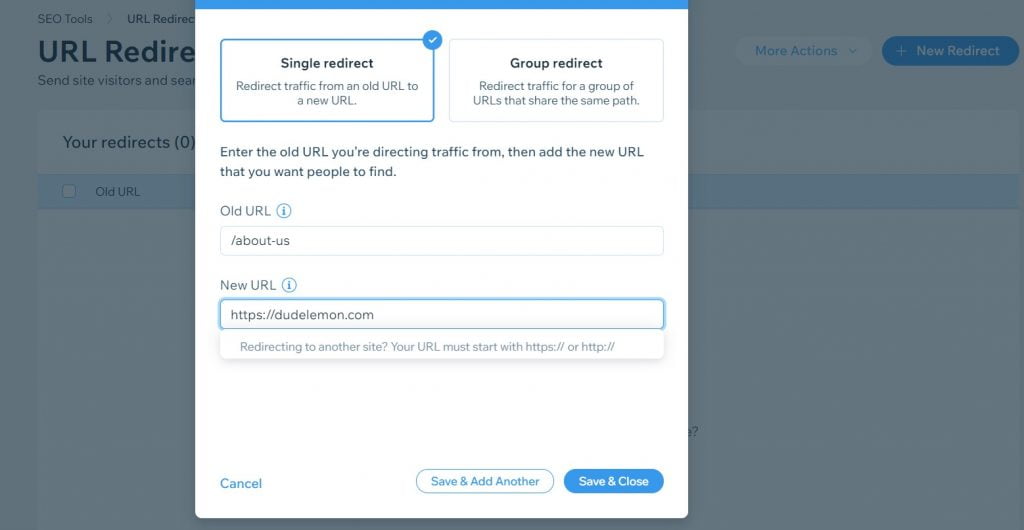
Step 3. Redirect Wix to Your New WordPress Site
Your migration is now finished, but you should also reroute Wix visitors to WordPress. This makes it simpler for your current audience to find your new site. Redirecting is crucial, but you can only do it on Wix if you have a custom URL. The redirect cannot be set up if you used a free Wix account. Instead, you can post a notice announcing your relocation and provide a link to the new website on the old one.
Conclusion
It can be a difficult process to switch from Wix to WordPress, but it’s worthwhile because you’ll have far more control over your data and be able to expand your site however you choose.
For those of you making the switch, we hope this migration guide will be useful.